12V / 24V Online Switch Panel configurator
Configure your new switch panel using our online panel configurator. Click here on the start screen below and get started immediately! (opens in a new tab)

Dont want to design your switchpanel yourself, but want our panel engineers to design it?
That possible as well. Fill in the online form, contact us, or call us!
Convert your ideas into a detailed design!
We make it as simple as possible to turn your ideas into a detailed design. The CSP panel configurator is an effective tool that supports you in setting up your first design.
5 steps to easily design your panel!
- Choose the dimensions of your panel
- Add edge finishes, such as a bevel, contour engraving, and mounting holes
- Click and drag your components into the switch panel. Easily distribute the buttons symmetrically across the panel
- Choose premium options, such as backlighting, dual LED push buttons, and USB-C chargers
- Send your design to us by creating a link where your design is saved.
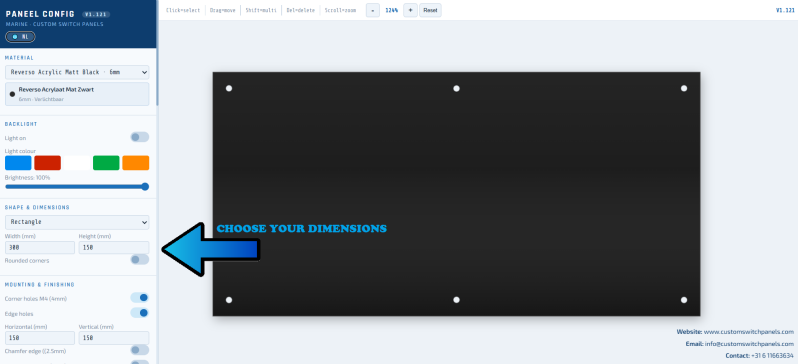
Step 1: dimensions
Select your desired panel dimensions.
The panel will scale automatically.
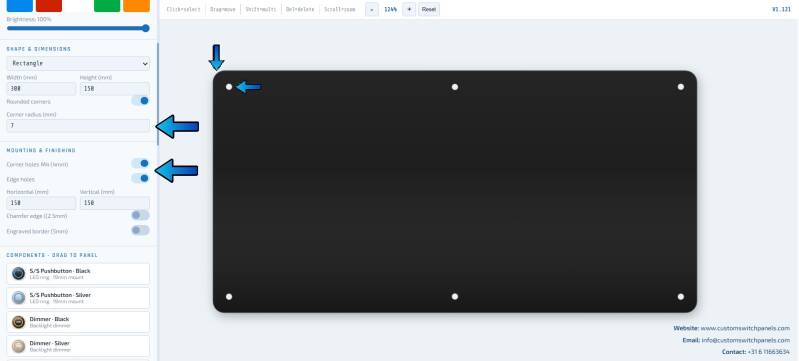
Step 2 - Corner finishing and mounting holes
Select the desired rounding for the corners of the panel.
You can also add the desired number of mounting holes. We recommend a minimum distance of 200mm per mounting hole.
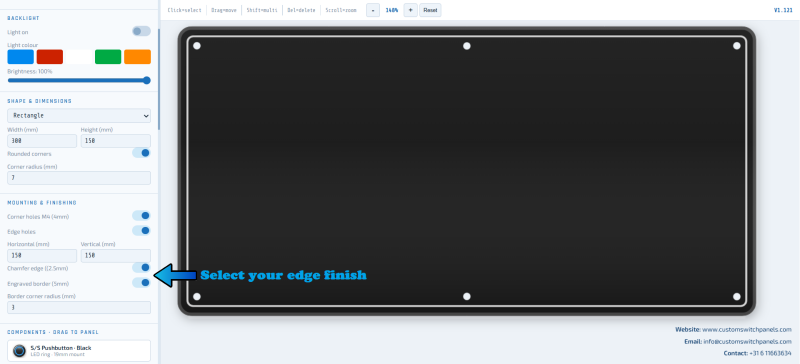
Step 3 - Edge Finishing
We offer the option to bevel, sand, and polish the edges all around the panel. For the perfect finish of your new panel, please select this option.
You can also have a line engraved around the contour of the panel.
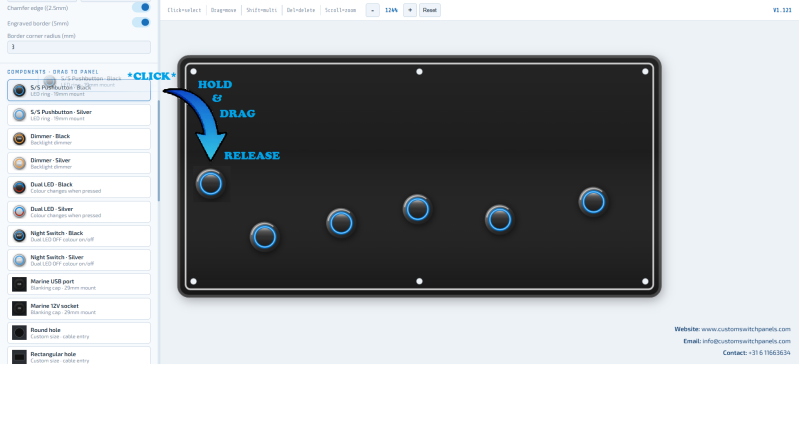
Step 4 - Select components
Drag the switches, USB ports, displays, and instruments to their desired location. Difficult to align? No worries; in the next step, we will show you how to easily distribute the components symmetrically and evenly.
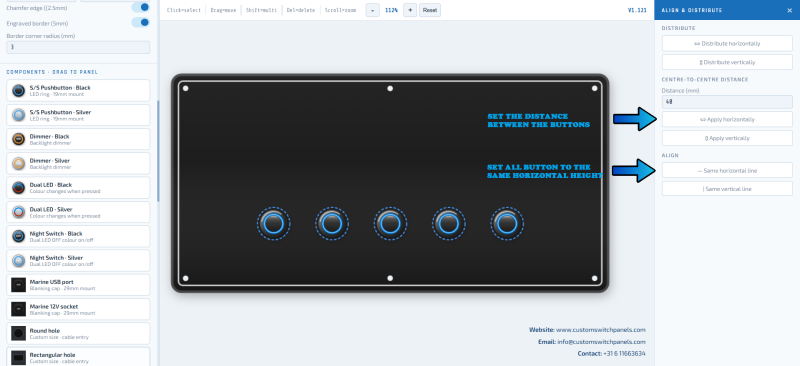
Step 5 - Align components
Select all components and then click on the alignment options on the right side. The components will position themselves on the same horizontal line, and you can determine the desired distance between the switches.
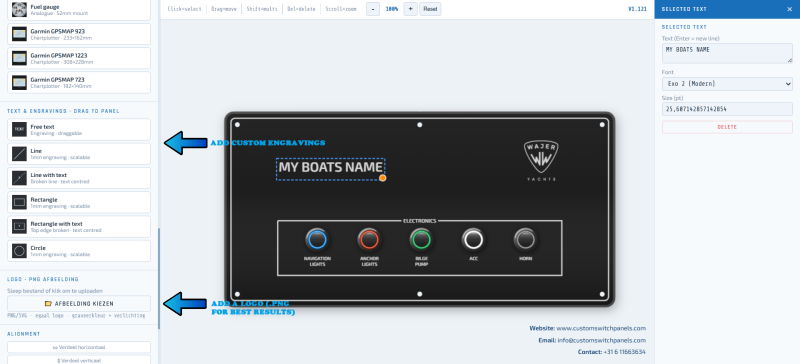
Step 6 - Inserting custom engravings
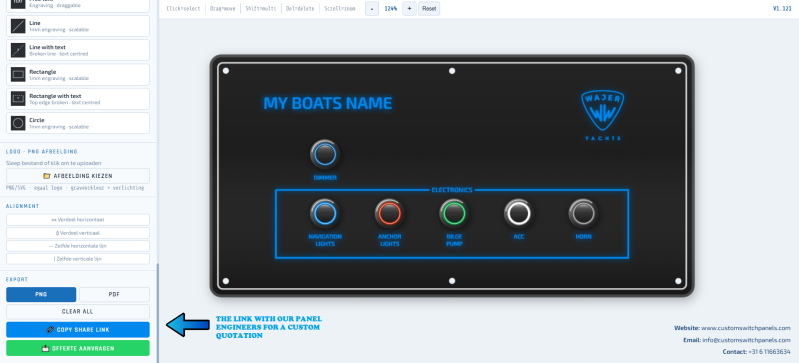
Add the custom engravings to your panel, such as lines, rectangles, separate text, or your boat logo.
You will get the best result if you upload a .png (a photo without a background). If you do not have this, go to www.remove.bg, upload your photo there, and the background will be automatically removed.
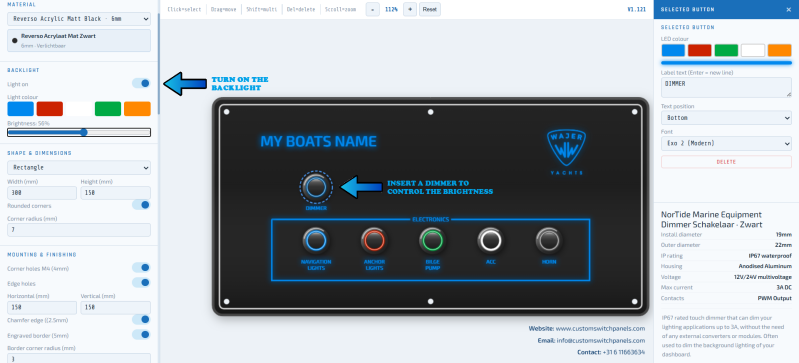
Step 7 - Backlighting
Have you chosen the Reverso materials? If so, we can illuminate the engravings so that you can see them clearly even in the dark.
Select the color and optionally add a dimmer (in the components list) to control the brightness. If you do not choose a dimmer, you can always switch the backlighting on and off with another button.
Step 8 - Final Check & Upload
Check your drawing and the dimensions. You can create a link to forward to our email, or send a WhatsApp message with your details. Please note: if you close the application, your design will be lost!